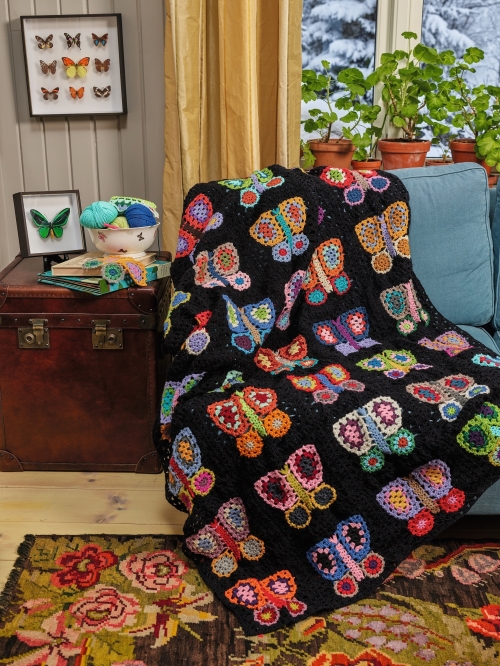
I fell in love with this crochet project as soon as I completed it. This granny square wrap top crochet pattern beautifully blends retro-inspired charm with a modern, stylish look. The rich jewel-tone squares stand out against the bold black borders, creating a striking color combination. Its flattering cropped shape adds a contemporary touch, while the dramatic bell sleeves bring movement, elegance, and a little extra flair to the finished design.

Jewel-Tone Granny Square Wrap Top: Free Crochet Pattern
If you know how to crochet a basic granny square, you’re already familiar with one of the most important techniques used in this project. This stylish wrap top combines vintage-inspired crochet with a modern silhouette, creating a beautiful garment with rich colors and eye-catching details.
The construction is more straightforward than it might appear. You’ll crochet individual granny squares, arrange and join them to form the body and sleeves, then finish the garment with neat borders and a waist tie. Rather than complicated shaping, the design relies on square motifs, careful assembly, and simple edging.
Let’s explore the materials, techniques, and construction details needed to make this colorful granny square wrap top.
Why This Granny Square Wrap Top Works
This design is a wonderful project for intermediate crocheters who want to create a distinctive handmade garment.
The wrap-style silhouette allows you to adjust the fit using the waist ties. Its overlapping front panels form a flattering V-shaped neckline, while the adjustable closure makes fitting more flexible than a fixed-front design.
The jewel-tone color palette gives the top a rich, luxurious appearance. Deep teal, burgundy, mustard gold, royal purple, and forest green create beautiful color combinations, while black borders bring the different shades together and add definition to each square.
The bell sleeves are another standout feature. Made by joining granny squares into sleeve sections, they add movement and a dramatic finish that makes this top especially eye-catching.
Materials Needed
Yarn
Use medium-weight, worsted yarn in the following colors:
- Black — approximately 400 yards for borders and edging.
- Teal — approximately 150 yards.
- Burgundy — approximately 150 yards.
- Gold or mustard — approximately 100 yards.
- Purple — approximately 100 yards.
- Forest green — approximately 100 yards.
- Deep red — approximately 100 yards.
A 100% acrylic yarn or acrylic blend is suggested for its stitch definition and easy care. Examples include Red Heart Super Saver, Caron Simply Soft, and Lion Brand Vanna’s Choice.
Crochet Hook
- 5.0 mm crochet hook (US H/8), or the size needed to obtain the required gauge.
Additional Supplies
- Tapestry needle for sewing seams and weaving in ends.
- Scissors.
- Stitch markers.
- Measuring tape.
Gauge
Gauge is important because the size of the granny squares affects the fit and proportions of the finished top.
The supplied pattern specifies that one completed five-round granny square should measure approximately 4 × 4 inches (10 × 10 cm) after blocking.
If your squares measure larger than expected, try a smaller hook. If they are too small, try a larger hook. Check your gauge before making all the motifs so that the finished garment is more likely to match your intended measurements.
Skill Level
Intermediate
You should be comfortable with the following techniques:
- Crocheting basic granny squares.
- Changing yarn colors between rounds.
- Joining crochet motifs.
- Working single crochet edging.
- Weaving in yarn ends.
If you are new to granny squares, practice making a few before starting the garment. Once the stitch pattern becomes familiar, the individual squares are relatively portable and easy to work on in stages.
Abbreviations and Stitch Definitions
The following abbreviations are used throughout the supplied pattern.
- ch — Chain: Yarn over and pull through the loop on your hook to create a chain stitch.
- sl st — Slip stitch: Insert the hook, yarn over, and pull through both the stitch and the loop on your hook. Slip stitches are used for joining rounds and moving across stitches.
- sc — Single crochet: Insert the hook into the stitch, yarn over and pull up a loop, yarn over again, and pull through both loops.
- dc — Double crochet: Yarn over, insert the hook, yarn over and pull up a loop, yarn over and pull through two loops, then yarn over and pull through the remaining two loops.
- 3-dc cluster: Three double crochet stitches worked into the same stitch or chain space.
- ch-sp — Chain space: The opening formed by chain stitches in a previous round.
- RS — Right side: The outward-facing side of the finished work.
- WS — Wrong side: The back side of the work.
Pattern Notes
Keep these points in mind while working on the top:
- Each granny square is crocheted from the center outward.
- Change colors at the end of rounds for clearly defined color transitions.
- The final round of every square is worked in black to create consistent borders.
- Weave in loose ends as you work to reduce the amount of finishing required later.
The Basic Granny Square
The granny square is the main building block of this wrap top. Although the color combinations can vary, the basic construction follows the same pattern.
Round 1
With the first color, make a magic ring. Chain 3, counting this as the first double crochet, then work 2 double crochet stitches into the ring. Chain 2.
Work 3 double crochet stitches into the ring, followed by 2 chains. Repeat this sequence twice more, then join with a slip stitch to the top of the beginning chain-3.
You should have four clusters and four corner chain-2 spaces.
Round 2
Change to the second color and slip stitch into a corner chain-2 space.
Chain 3, work 2 double crochet stitches into the same corner space, chain 2, then work 3 double crochet stitches into that space to form the first corner.
Chain 1. In the next corner chain-2 space, work 3 double crochet stitches, chain 2, and another 3 double crochet stitches.
Repeat around the square, joining with a slip stitch to the top of the beginning chain-3.
Round 3
Change to the third color and slip stitch into a corner chain-2 space.
Chain 3, work 2 double crochet stitches into the same space, chain 2, then work 3 double crochet stitches into the corner.
Chain 1 and work 3 double crochet stitches into the next chain-1 space. Chain 1, then work the corner combination of 3 double crochet stitches, 2 chains, and 3 double crochet stitches into the next corner space.
Repeat around the square and join with a slip stitch.
Round 4
Change to the fourth color. Continue using the same granny-square construction, working the corner combination into each corner space and adding double crochet clusters along the sides.
At this stage, there should be two clusters along each side between the corners.
Join the round with a slip stitch.
Round 5
Change to black yarn and continue the established granny-square pattern.
There should now be three double crochet clusters along each side between the corners. Join with a slip stitch and fasten off.
The supplied pattern specifies that the completed square should measure approximately 4 inches.
Squares Needed
The original layout describes a small/medium version with an adjustable waist tie.
Large Squares
The layout lists two large squares for the front body panels and two optional squares for the back. The optional back panels are intended for a more covered variation; the supplied description also mentions an open-back style.
Medium Squares
Twenty-four medium squares are listed for the sleeves, with twelve squares allocated to each sleeve. These squares are described as approximately 3 inches across.
Small Accent Squares
Small three-round squares, approximately 2 inches across, are optional and can be used to add variety to the sleeve design.
The front panels are arranged diagonally, creating the geometric effect associated with the wrap silhouette.
Note: The supplied source gives both a four-round/five-round square description and a separate extended-square instruction for the body. Check the original design’s measurements and layout before beginning to ensure that the motifs match the intended garment.
Front Panel Construction
The front of the wrap top is formed from two large granny squares positioned diagonally.
The supplied instructions describe making two extended squares for the front panels. Continue the basic granny-square pattern beyond the fifth round until each square measures approximately 6.5–7 inches across.
Each additional round follows the same principle: add one more double crochet cluster along each side between the corners.
Arrange the completed squares as diamonds, with their corners pointing upward, downward, and toward the sides. Their placement creates the angled front panels and the overlapping shape of the wrap top.
Joining the Front Panels
Lay the two large front squares on a flat surface with their corners pointing up, down, left, and right.
Position the panels so that they overlap at the center front, with the left panel crossing over the right. Leave the upper V-shaped section open to create the neckline.
Using black yarn and a tapestry needle, whip stitch the overlapping area where the panels meet. Avoid closing the neckline opening.
The upper corners of the squares form the shoulder points, while the side corners provide the attachment points for the sleeves.
Sleeve Construction
Each sleeve is described as using twelve medium granny squares arranged into a tube.
Square Layout
Arrange the twelve squares in a grid of three squares across and four squares tall. The wrist end is designed to open into the characteristic bell shape.
Before joining the squares, lay them out and check the color arrangement. Moving the motifs around can help balance the jewel tones across both sleeves.
Joining the Squares
Use black yarn to join the squares with either single crochet or whip stitch.
For a flatter seam, work through the back loops only. For a more prominent decorative ridge, work through both loops.
Join the long edges first to create a strip. Then join the short edges to form the sleeve tube.
Wrist Border
With black yarn, join at any corner of the wrist opening.
Round 1: Chain 1 and work single crochet stitches evenly around the opening, aiming for approximately three single crochet stitches along each granny-square side. Join with a slip stitch.
Rounds 2–4: Chain 1, work one single crochet into each stitch around, and join with a slip stitch.
Fasten off. The black border creates a clean cuff that contrasts with the colorful squares and complements the flared sleeve shape.
Attaching the Sleeves to the Body
Align the top of each sleeve tube with the shoulder and side points of the front panels.
Using black yarn, attach the sleeves with whip stitch or single crochet. Work carefully so that the fabric is distributed evenly and the seams do not pull the garment out of shape.
The supplied instructions describe the sleeves as attaching near the upper squares on each side of the body.
Before completing the seams, pin the pieces together and check that both sleeves sit at a similar height.
Neckline and Front Edging
The black neckline border brings the front panels together visually and emphasizes the V-shaped opening.
V-Neckline Border
With black yarn, join at the back of the neck, or at the side if following the open-back variation.
Row 1: Chain 1 and work single crochet stitches evenly down the left front edge, around the point of the V, and up the right front edge. Turn.
Row 2: Chain 1 and work single crochet across. At the point of the V, work 3 single crochet stitches into the center stitch to help maintain the angle. Turn.
Rows 3–5: Repeat Row 2.
Fasten off.
The resulting black edging gives the neckline a defined finish and ties together the dark borders around the granny squares.
Waistband
The waistband adds structure to the lower edge and contributes to the cropped shape of the top.
Bottom Ribbed Band
With black yarn, join at a side seam.
Round 1: Chain 1 and work single crochet evenly around the entire lower edge, aiming for approximately three single crochet stitches along each granny-square side. Join with a slip stitch.
Rounds 2–8: Chain 1 and work single crochet stitches in the back loops only around the edge. Join each round with a slip stitch.
Fasten off.
Working through the back loops creates a ribbed texture that contrasts with the open granny-square fabric.
Tie Closure
The waist tie allows the wearer to adjust the overlap and fit of the wrap top.
Making the Tie
Chain 200, or adjust the length to suit your preference. The supplied instructions estimate a length of approximately 60 inches.
Row 1: Work a single crochet into the second chain from the hook and into each chain across. The stated stitch count is 199 single crochet stitches.
Fasten off.
Optional Tie Decorations
For a decorative finish, add small tassels or pom-poms to the ends of the tie.
One simple tassel method is to wrap yarn around a piece of cardboard, cut the strands at one end, tie the bundle securely in the middle, and trim the ends to your preferred length.
Attaching and Tying
Thread the tie through the waistband at the center back. Bring both ends around to the front, cross them over, and wrap them around the waist before tying a bow at the front or side.
Adjust the placement to achieve the overlap and fit you prefer.
Finishing Touches
Blocking
Blocking helps even out the granny squares and gives the finished garment a neater appearance.
Wet blocking is one method: soak the finished top in cool water, gently squeeze out excess moisture without wringing, and lay it flat to dry. Pin the garment carefully if necessary to help square up the motifs.
Follow the care instructions for your chosen yarn before wet blocking.
Weaving in Ends
This project creates many yarn ends because each square uses several colors. Weave each end through at least 2 inches of stitches on the wrong side, then trim the excess yarn carefully.
Secure ends thoroughly, particularly around seams and areas that will experience movement when the top is worn.
Sizing Adjustments
The wrap construction offers some flexibility, but the square dimensions and sleeve layout will still affect the final fit.
To Make the Top Larger
The supplied instructions suggest adding another round to the granny squares, making additional squares for the body panels, and lengthening the waistband as needed.
To Make the Top Smaller
Try using fewer rounds per square or a smaller hook. Check the resulting square measurements before assembling the garment.
The adjustable waist tie can help refine the fit, but it cannot compensate for every difference in garment width, shoulder placement, or sleeve length.
Tips for Success
Plan Your Colors
Arrange the colors before you start joining the squares. Varying the center and outer-round colors can create a more interesting arrangement while keeping the overall palette coordinated.
Maintain Consistent Tension
Try to keep every square the same size. Compare the first few motifs as you work and adjust your hook or tension if necessary.
Consider Joining as You Go
If you prefer to minimize sewing, joining the motifs during their final round may be an option, provided the chosen joining method is compatible with the pattern layout.
Check the Fit During Assembly
Pin the pieces together temporarily and try the garment on, if possible, before making the joins permanent. This can help you assess the sleeve placement, front overlap, and overall length.
Final Thoughts on This Jewel-Tone Granny Square Wrap Top
This granny square wrap top combines small, manageable crochet motifs into a striking handmade garment. Each square is a portable project on its own, and the colorful pieces gradually come together to form a distinctive design.
The rich jewel tones and contrasting black borders create a bold, coordinated look. The flared sleeves add movement, while the overlapping front and adjustable tie bring flexibility to the silhouette.
Take your time planning the colors, matching the square sizes, and checking the garment’s fit during assembly. With careful finishing, the result can become a unique addition to a handmade wardrobe.
Thank you for following along with this crochet project. Experiment with your favorite color combinations and enjoy the creative process of turning individual granny squares into a wearable design.
Happy crocheting!